LMS Integration
How do I use Storyboard That in Schoology?
How to Add Storyboard That LTI 1.3 as an App to Canvas
How to Add Storyboard That as an App in Schoology
LAUSD Customers - How to Log In to Storyboard That
New York City Customers - How to Log In to Storyboard That
D2L - Brightspace - Creating Storyboard That Assignments
D2L - Brightspace - Setting Up Storyboard That
Buzz LMS Integration with Storyboard That
What is a "StoryboardThat Playground" Account?
Frequently Asked Questions
Other
Undelete Storyboards
What are the Software Requirements?
Accessibility Improvements for Chrome
How Do I Delete a Storyboard?
Where's my save history?
How Do I Record Audio?
How Do I Unsubscribe From Emails?
How Do I Change the Name of a Storyboard?
Error when Using Storyboard That
Download / Export
How Do I Print My Storyboard?
Download a Slide Presentation
Download a PDF
Download Cells Separately
Download a High-Resolution Image
What are the Download Options?
Make a Folding Card
Sharing Storyboards
Share a Link to a Storyboard
Share a Storyboard as a File
Embed a Storyboard on a Website
Make a Storyboard Public
Share a Printed Storyboard
How Can I See Other People's Storyboards?
Can I Publish a Storyboard?
Sharing Storyboards for Classrooms
Account Settings
How Do I Change My User Name?
How Do I Change My Language?
How Do I Change My Password?
How Do I Delete My Account?
Logging In
Can I Log In With Google?
I Don't Remember My User Name
How do I Create an Account?
How Do I Log In?
How do I Update My Email Address?
I Forgot My Password
Multiple Accounts
Get Started!
Get a Premium Account for 1 month for $1.00!
How do I access Save or Revision History of a Storyboard?
Can I Make a Book?
Spell Check
Google Single Sign-On (SSO) "Access Blocked"
Why Does My Account Say "Free" When I’m Paying?
Storyboard Creator
Storyboard Layouts
Scenes
Characters
How do I put a character in a wheelchair?
How do I add items to characters?
Can I Make My Own Character?
Pose Characters
How to Copy a Character in the Storyboard Creator
Text
Edit Images
Layer Images
Multi-Select Images
Edit Image Functions
Lock Position
Filters
Align
Resize Images
Flip and Rotate Images
Change Colors
Add Images
Settings and Support
Storyboard Creator Options
Touch Interface Changes
How do I filter age appropriate images in search?
Edit a Storyboard
How do I Split a Storyboard?
Record Audio in the Storyboard Creator!
Embedding Content
Embedding Content - Google Workspace
Embedding Content - Google Maps
Save a Storyboard
Embedding Content - YouTube Videos
How do I combine storyboards?
Subscription / Billing
Subscription Types
What's Available in the Free Version?
Account Types: Individual Edition
Account Types: Business Edition
Payment Options
Frequency of Payments
Forms of Payment
Print Invoices
Purchase Order Information
Do I Have to Purchase for a Year?
Do You Accept Purchase Orders?
Change Subscription
How Do I Change the Type of Account I Have?
Starting / Stopping Your Subscription
How Do I Update My Credit Card?
Cancel Subscription
Cancel Subscription
I Already Canceled, Why am I Being Charged?
If I forget to cancel my subscription, will you refund the last charge?
View My Billing History
I purchased a subscripton but am still being prompted to pay
Education Edition
Security
Delete Student Data
Storyboard Security Settings
Student Data
Where can I find your privacy policies?
Free Trial for Teachers
What Happens When My Free Trial Ends? (Education)
How do I Remove My Trial?
I am Not a Teacher
Can I Restart My Teacher Trial?
Teacher Dashboard
Co-Teachers
What Automatic Rostering Options Are There?
How do I Make a Worksheet?
Account Associated with Multiple Schools
How Do I Reset My Account?
What is the Teacher Dashboard?
Students & Classes
How do I Add Students to My Account?
Can more than one student work on the same storyboard at once?
Delete Student Accounts
View and Manage Student Accounts
How Do I Roster With Google Classroom?
How to Merge Duplicate Classes
How do I Update a Class Name or Password?
My Student has a Free Account. How can I change them to a student?
What Are Classes?
How Do Students Update Their Display Name?
How do I add students to or remove students from a class?
How Do I Delete a Class?
View and Manage Classes
How can students share or present storyboards?
How Do I Join a Class?
Do Students Need Their Own Accounts?
How do I View Student Work?
How do I Print Login Cards?
How do I add a class?
How do I roster with ClassLink?
My students can't save!
How do I roster with Clever Library?
Assignments
How do I share an assignment with other teachers?
How Do Students Submit Assignments?
Add a Template to an Assignment
Copy a Pre-Made Assignment
What is a Template?
What are Assignments?
How to Grade Storyboards in Google Classroom
How to Share an Assignment to Google Classroom
How do I change the assignment for a storyboard?
Print All Storyboards in an Assignment
How can I add a student example to my assignment?
My Student Can't See My Assignment
Show and Hide Assignments
Download All Storyboards in an Assignment
Add Rubric to Assignment
How Do Students Get Assignments?
How can I grade or leave feedback on an assignment?
Delete Assignment
Example Assignments
Admin Dashboard
Admin: Add Teachers
How do I add a teacher who already has an account?
Admin: Delete Teachers
How do I change the role of a user?
How do I use Storyboard That in Canvas?
Google Translate on Student Accounts
My School has an Account
My Students Signed Up for a Free Account
Business Edition
Individual Edition
- All Categories
- LMS Integration
- How do I use Storyboard That in Schoology?
How do I use Storyboard That in Schoology?
How to Create and Grade Storyboard That Assignments in Schoology. These steps must be done AFTER Storyboard That has been added as an app to your Schoology account. Creating a Storyboard That Assignm…
How to Create and Grade Storyboard That Assignments in Schoology
Creating a Storyboard That Assignment in Schoology for your students is the vital next step!
Once your students click on their assignment in Schoology, their Storyboard That accounts will be automatically provisioned and they can get creating!
Follow these easy steps to Create and Grade Storyboard That Assignments in Schoology:
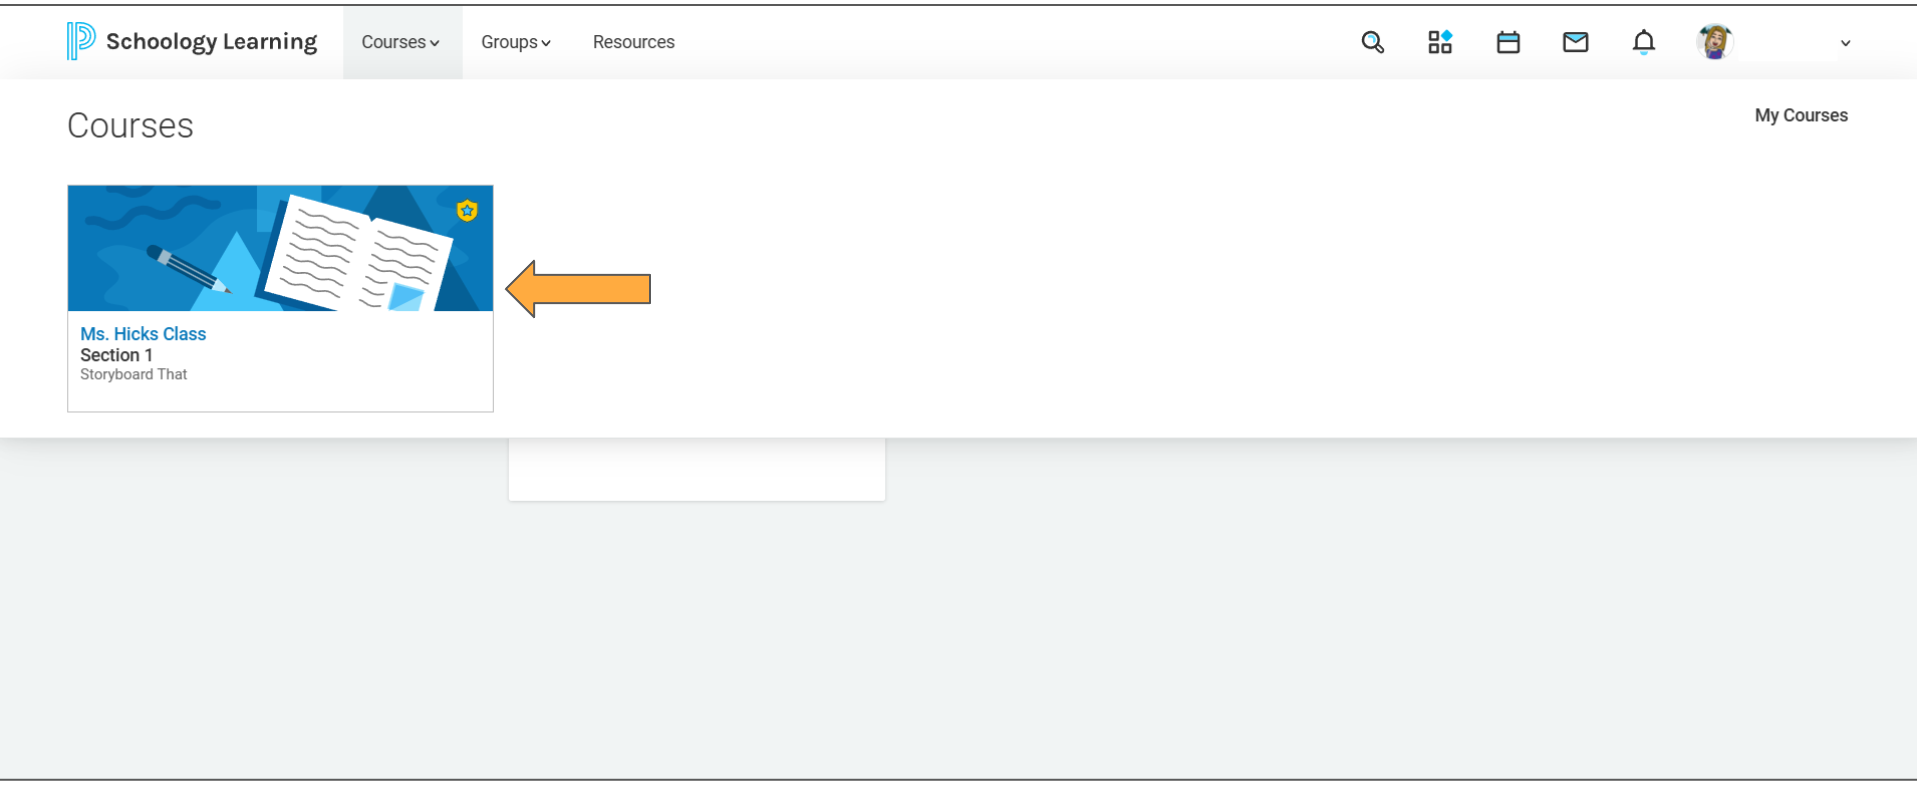
- Go to one of your Courses:
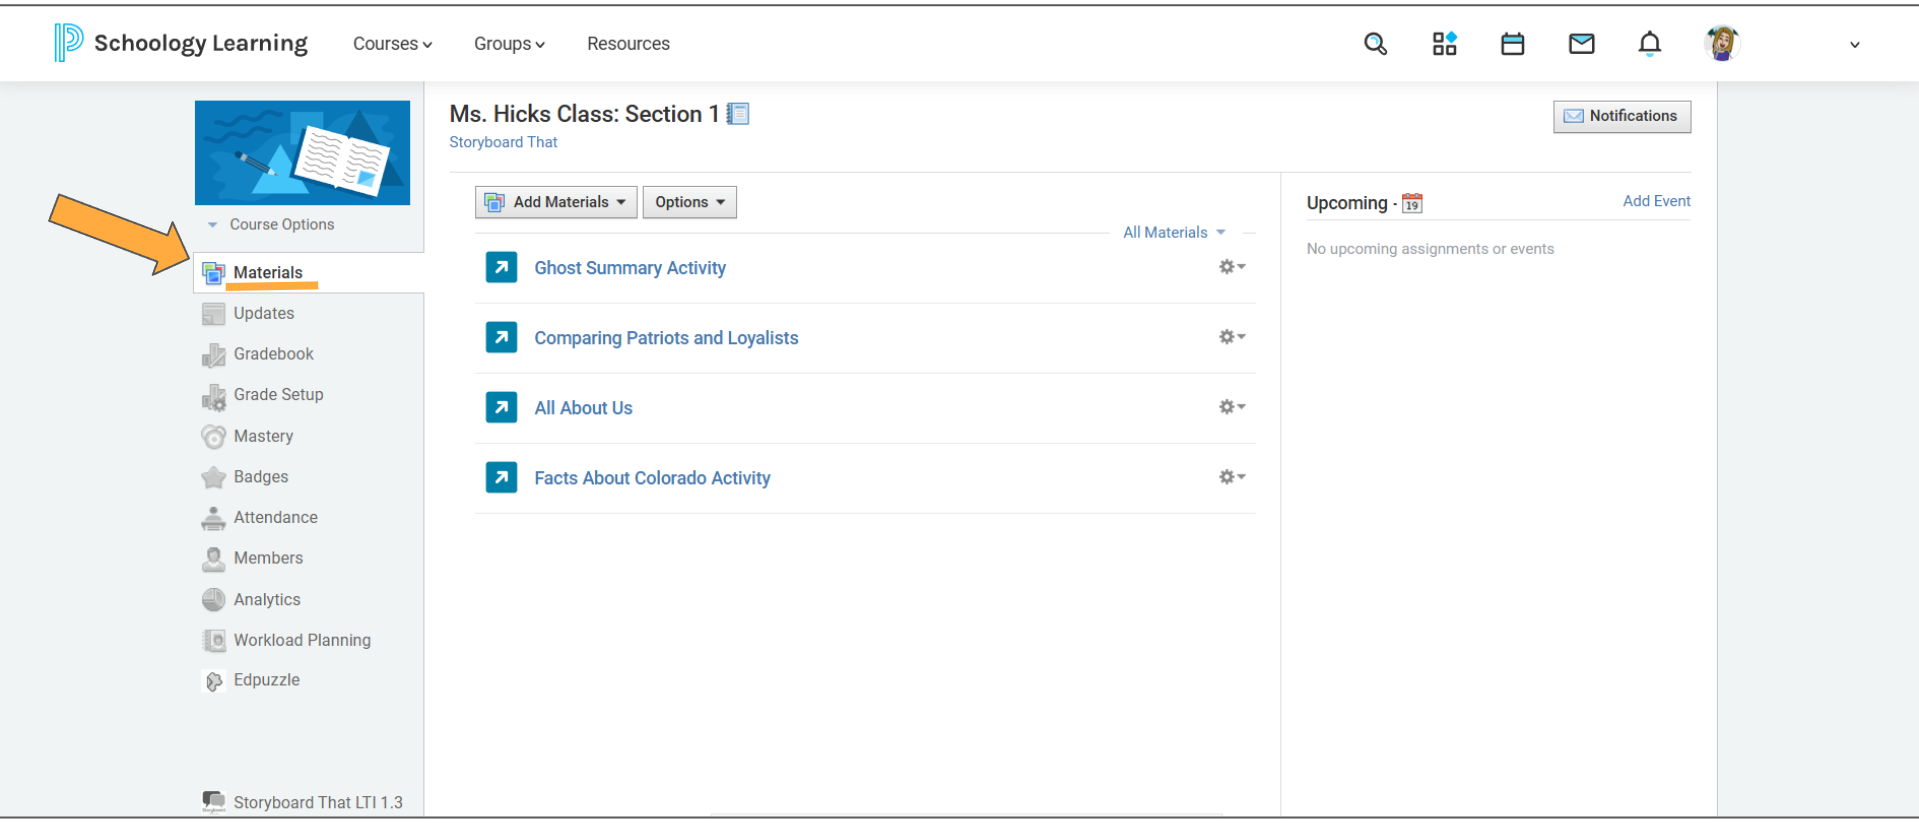
- Click on "Materials"
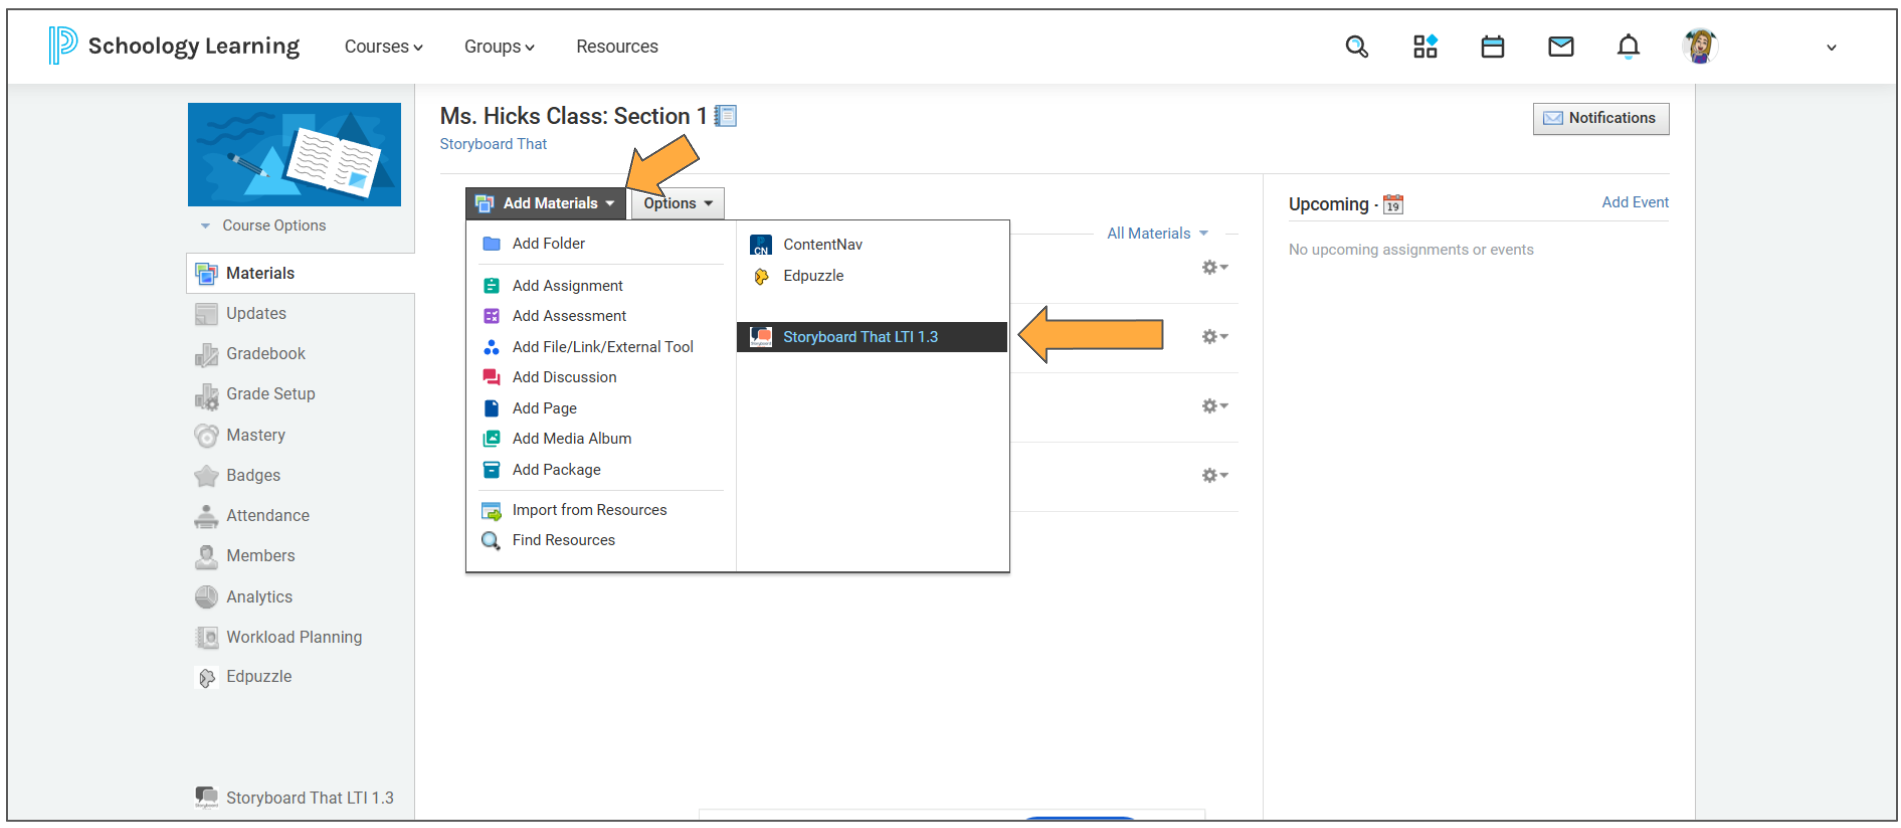
- Select "add materials" and choose "Storyboard That LTI 1.3"
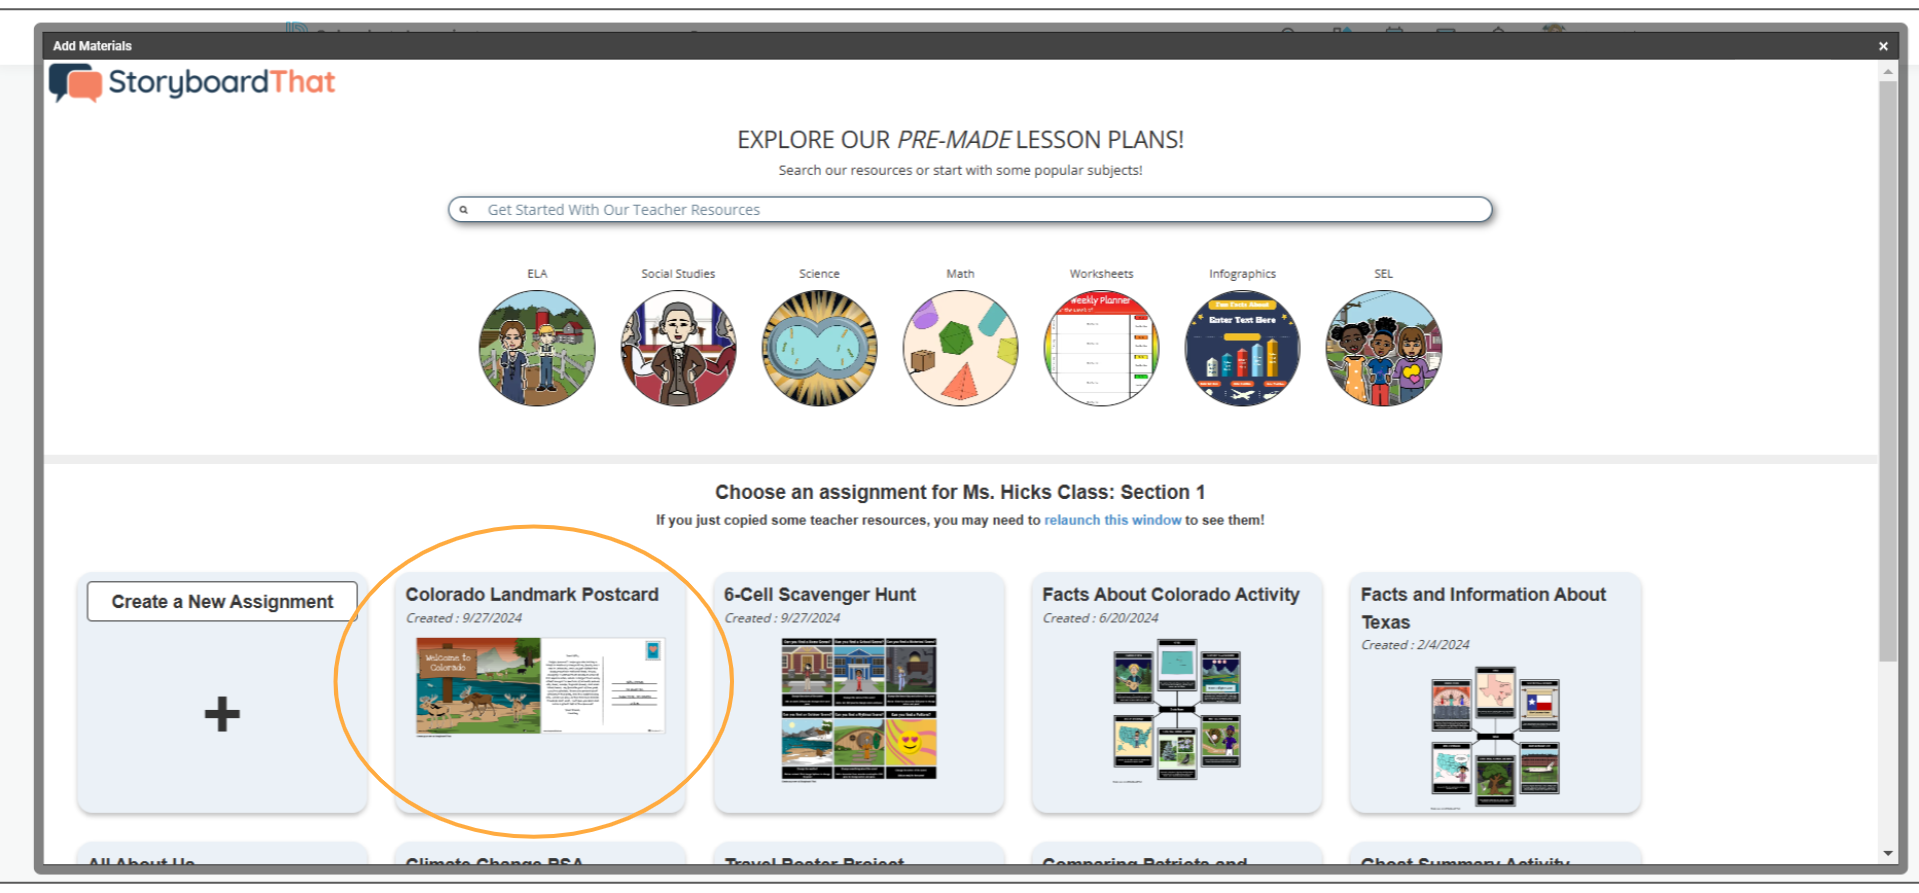
- From the Assignment Selector window that pops up, you can:
- Browse Storyboard That's resources,
- Make a new Storyboard That assignment from scratch, or
- Choose an existing assignment. (Assignments you previously copied from Storyboard That's Teacher Resources will be shown here!)
- Once you select an assignment, it will be listed in your AND your students' Materials section.
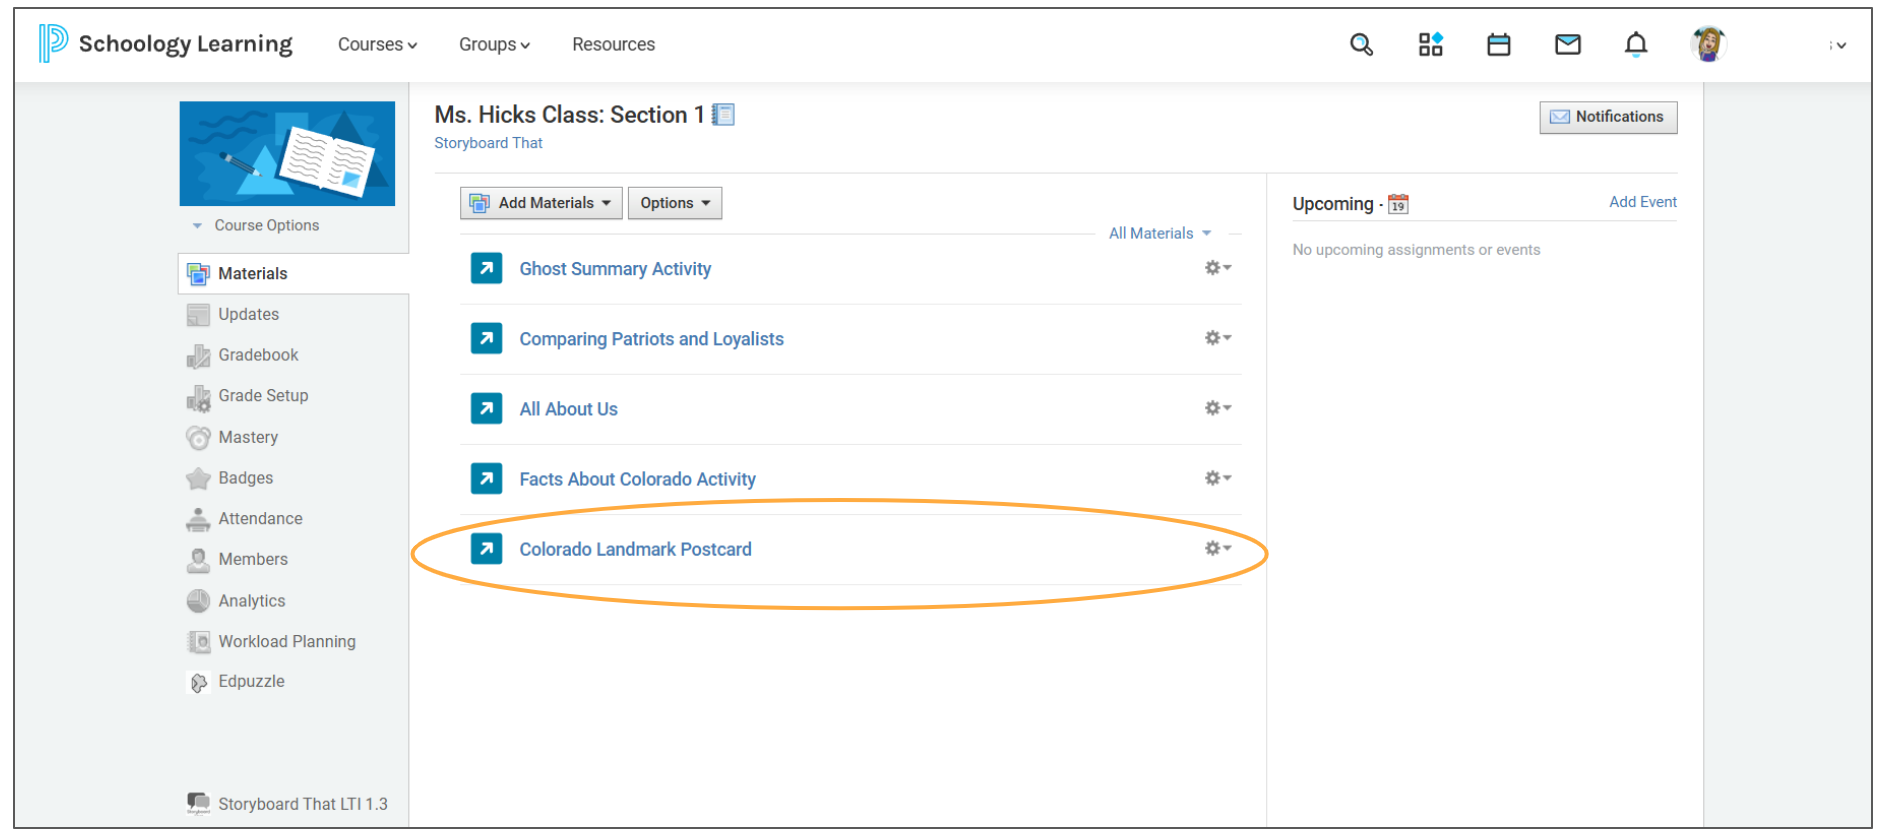
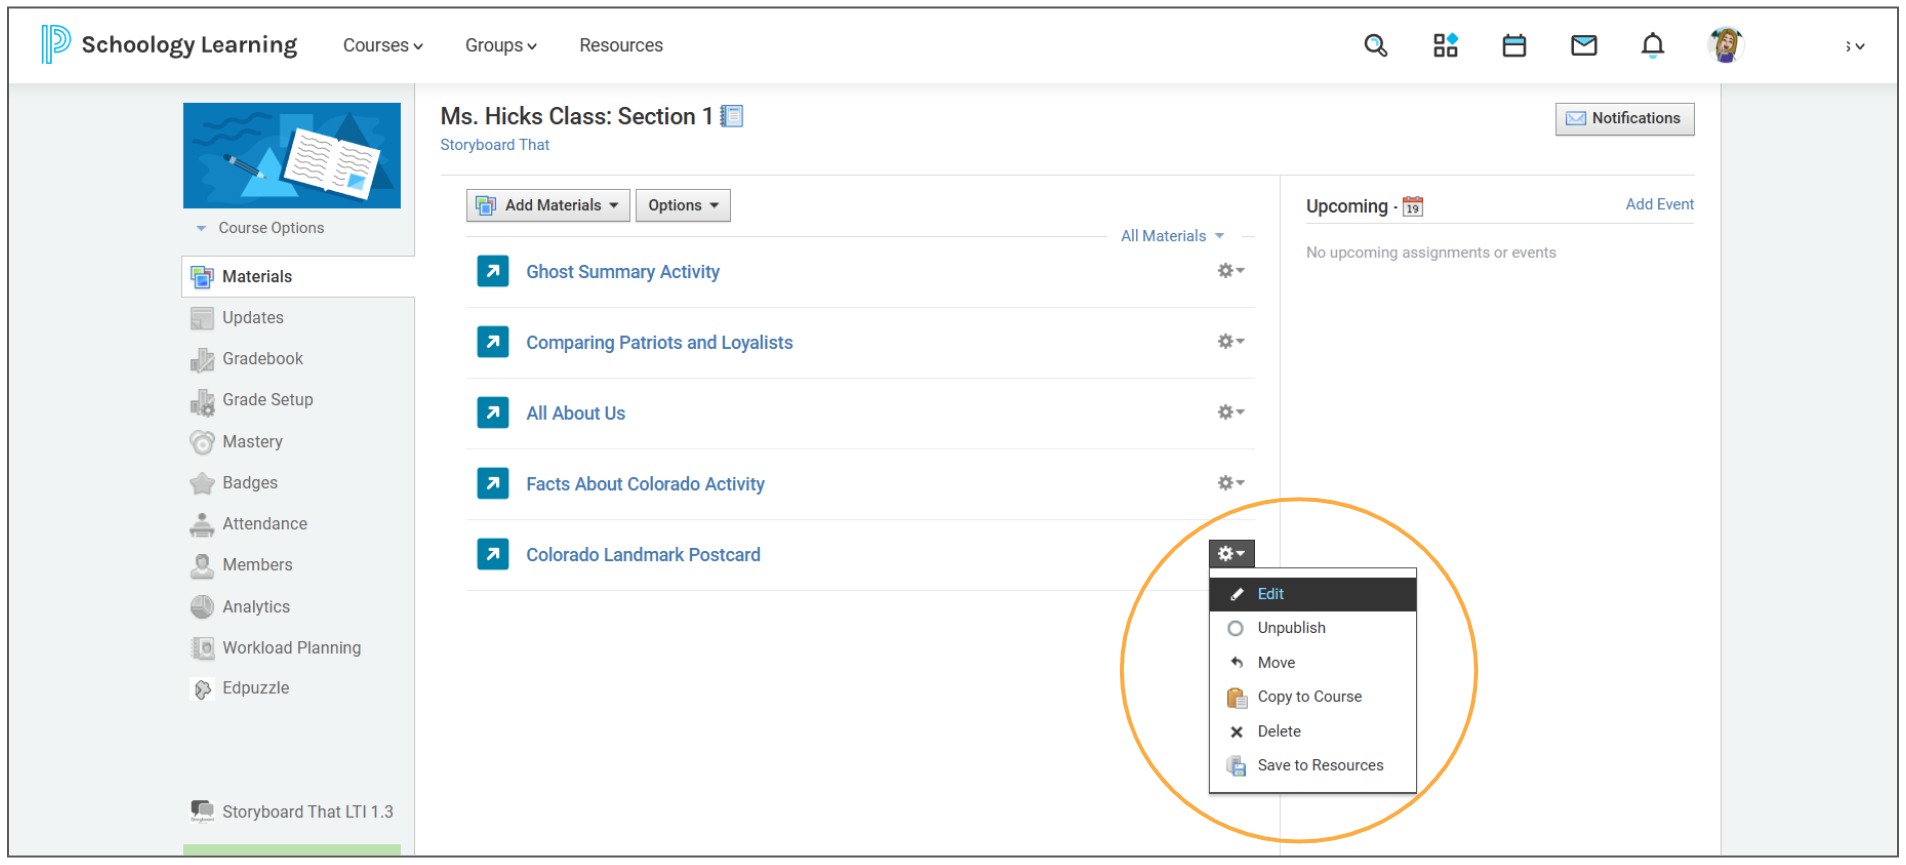
- You can edit the assignment settings by clicking the gear icon.
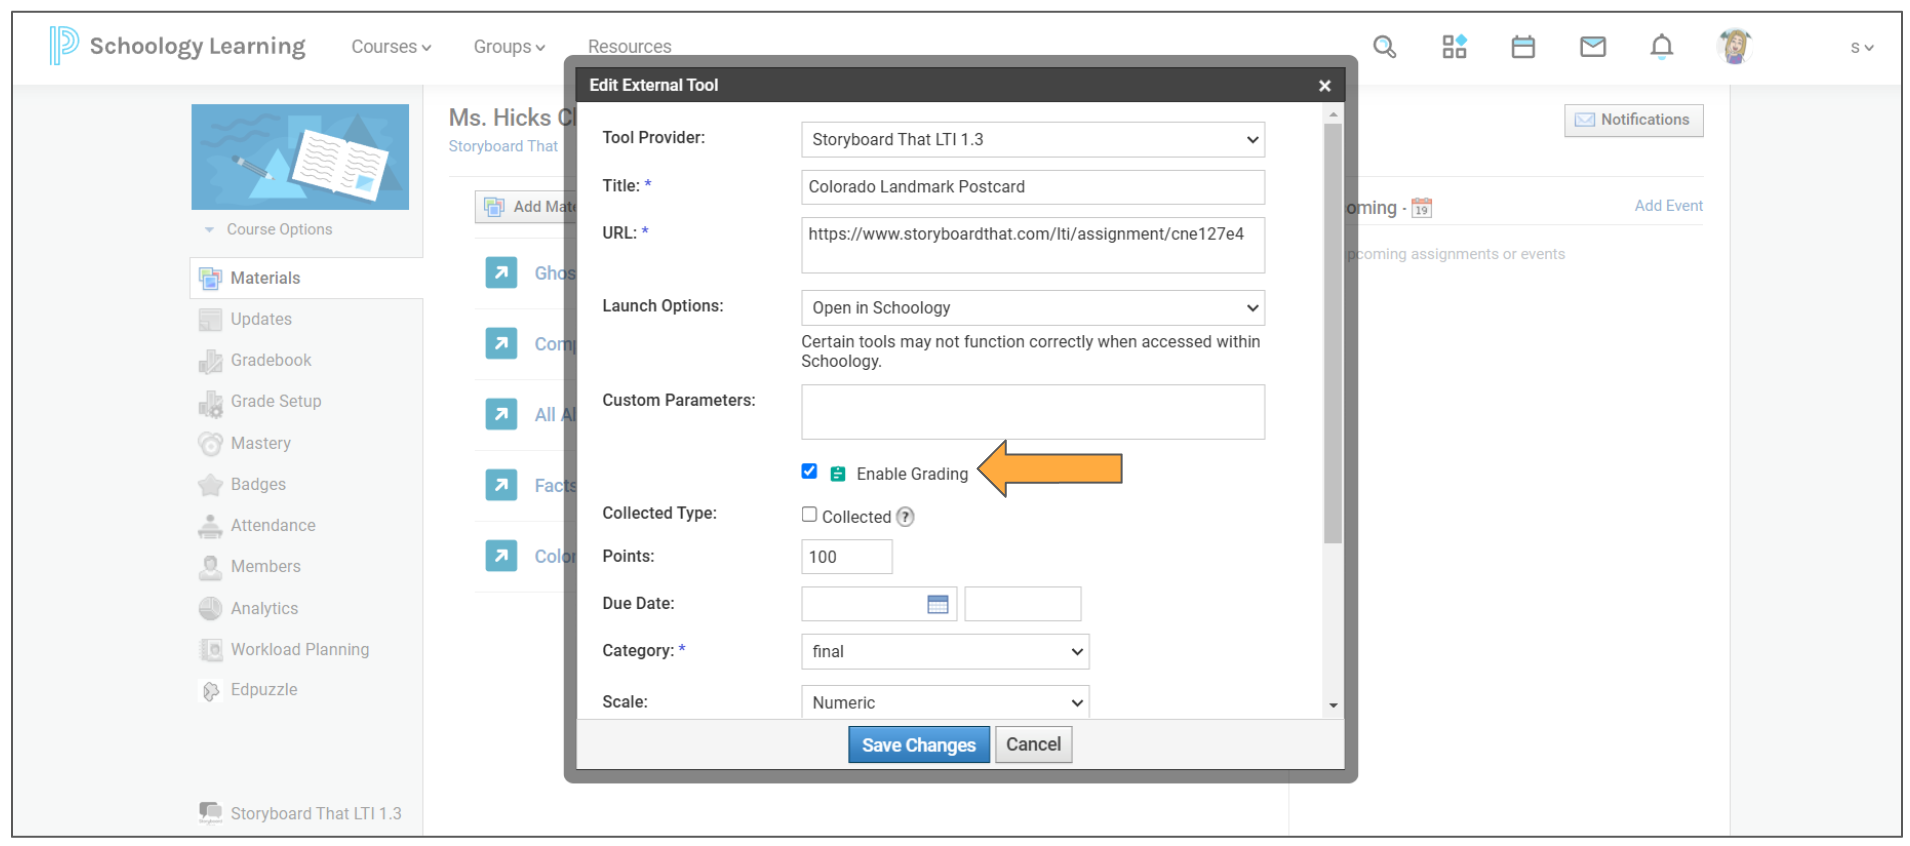
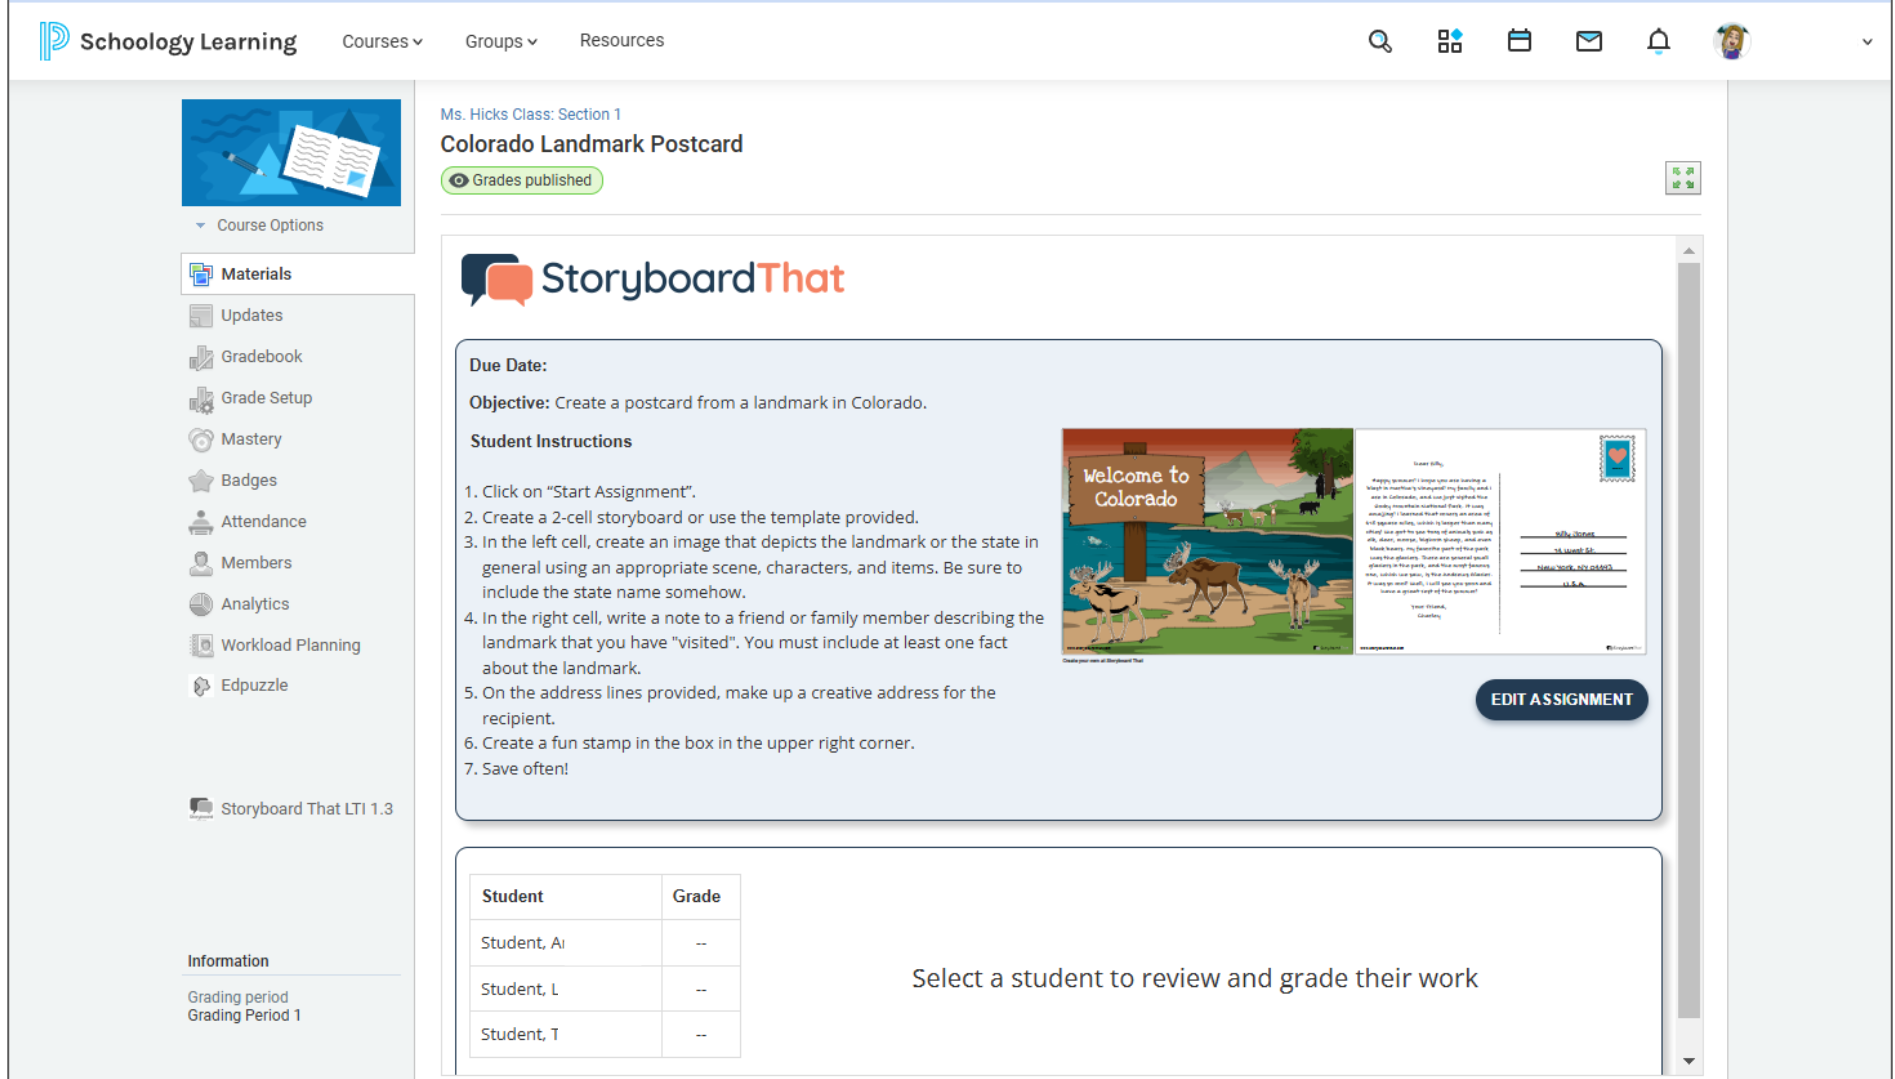
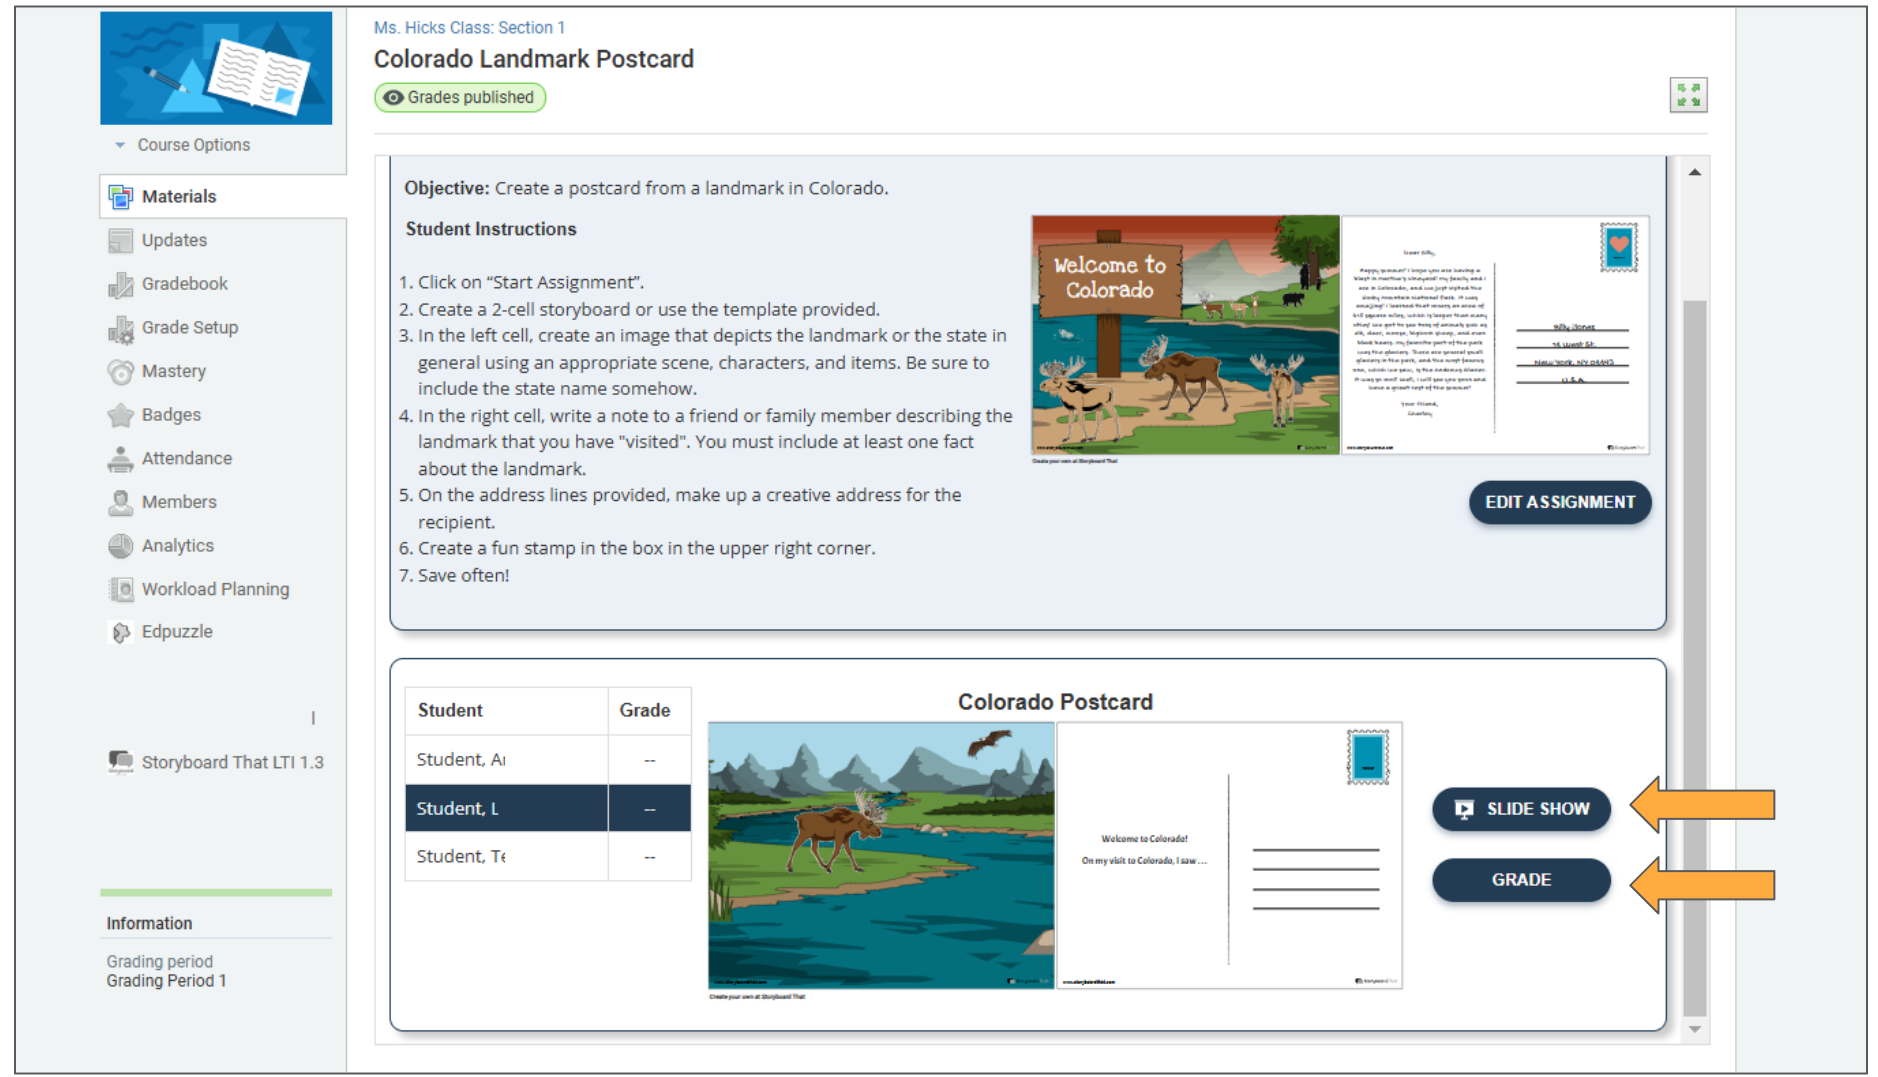
- Once students begin creating, you will be able to view their work by clicking on their name from the class list below the assignment instructions.
- To review your student's storyboard, you can click "Slideshow". To grade their storyboard, click "Grade".
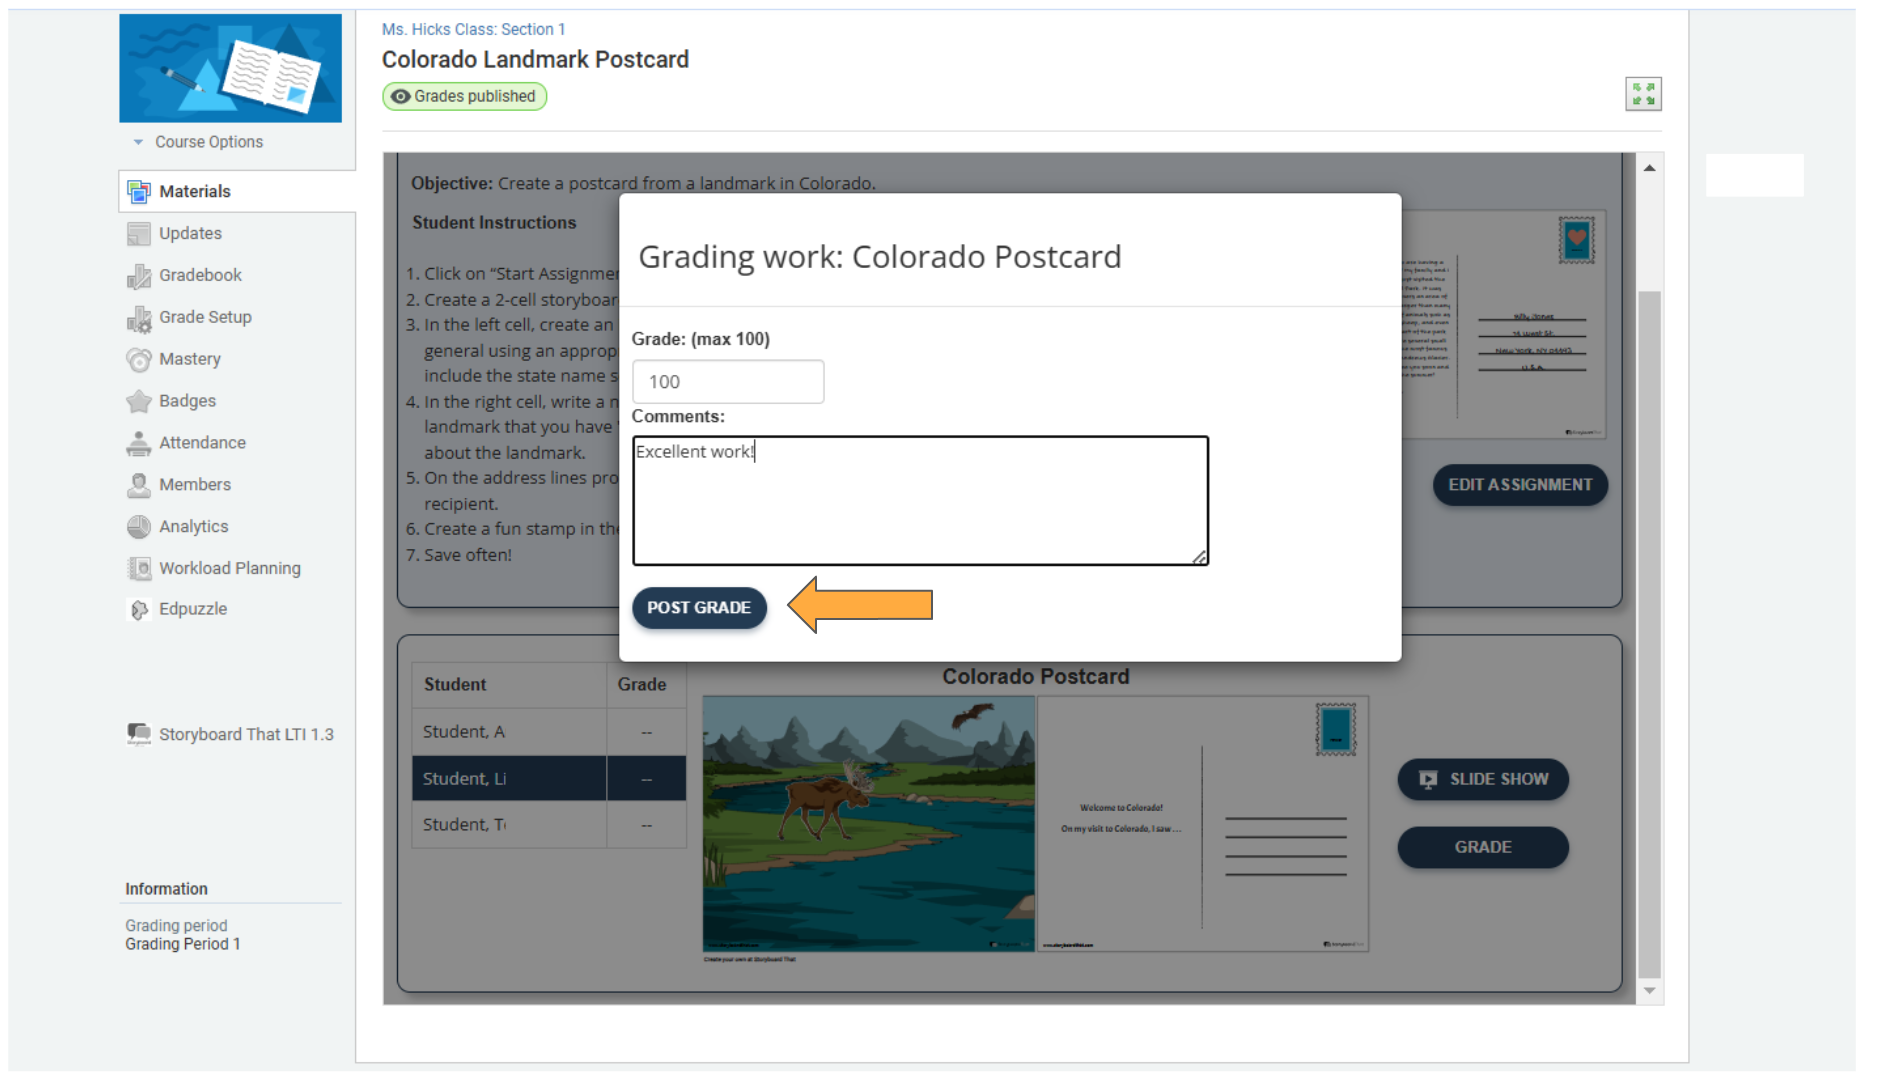
- When you click "Post Grade" the grade will be submitted to the Gradebook!
- Need Help? Watch this VIDEO on how to create a Storyboard That assignment in Schoology.
How did we do?
How to Add Storyboard That LTI 1.3 as an App to Canvas
