Resize Images
You can make any of the images bigger or smaller to adjust for scale or depth in your storyboards.
You can make any image in your storyboard bigger or smaller!
How to Resize Images
- Select an object. You will see blue and gray circles appear around your object.
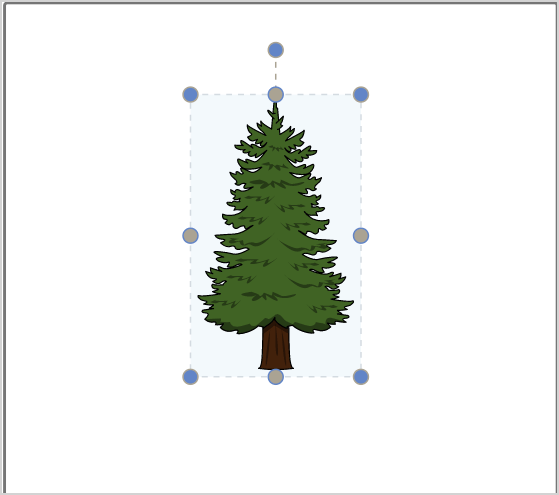
- Click and drag a blue circle in one of the four corners (anchor sizing handle).
You can make the object larger or smaller, depending on the direction you drag the circle. The blue circles in the corners scale the image, or keep the proportions the same.


Alternatively, you can use the shortcut keys to scale the object up or down. After selecting an object, hold the Shift key and then the up arrow key to make the object larger, or the Shift key and the down arrow key to make the object smaller.
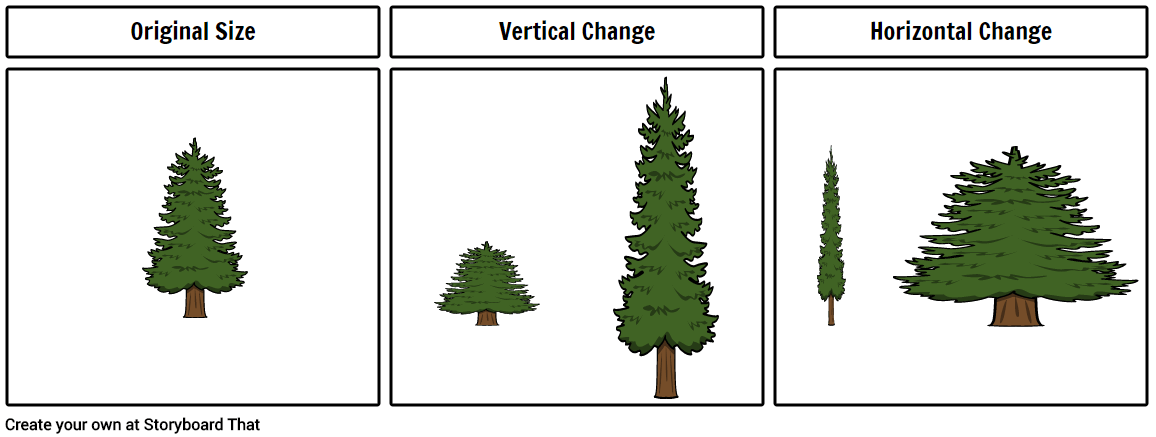
Resize by Distorting
The gray circles (sizing handles) stretch or squish an image vertically or horizontally. The top and bottom gray circles make the object shorter or taller, and the right and left gray circles make the object thinner or wider.
Certain objects do not allow changes in ratio, and those objects will only have the blue circles in the corners and no gray circles.
How did we do?
Layer Images
Flip and Rotate Images